Langdock
Langdock connects to your Kirby site as an MCP integration. To add it, you need the permission to create integrations in your Langdock workspace.
Add the integration
Copy the MCP URL from the Agents view in the Panel. Open app.langdock.com, open the profile menu at the bottom left and choose Integrations. Click Add integration (1) and choose Start from scratch (2).

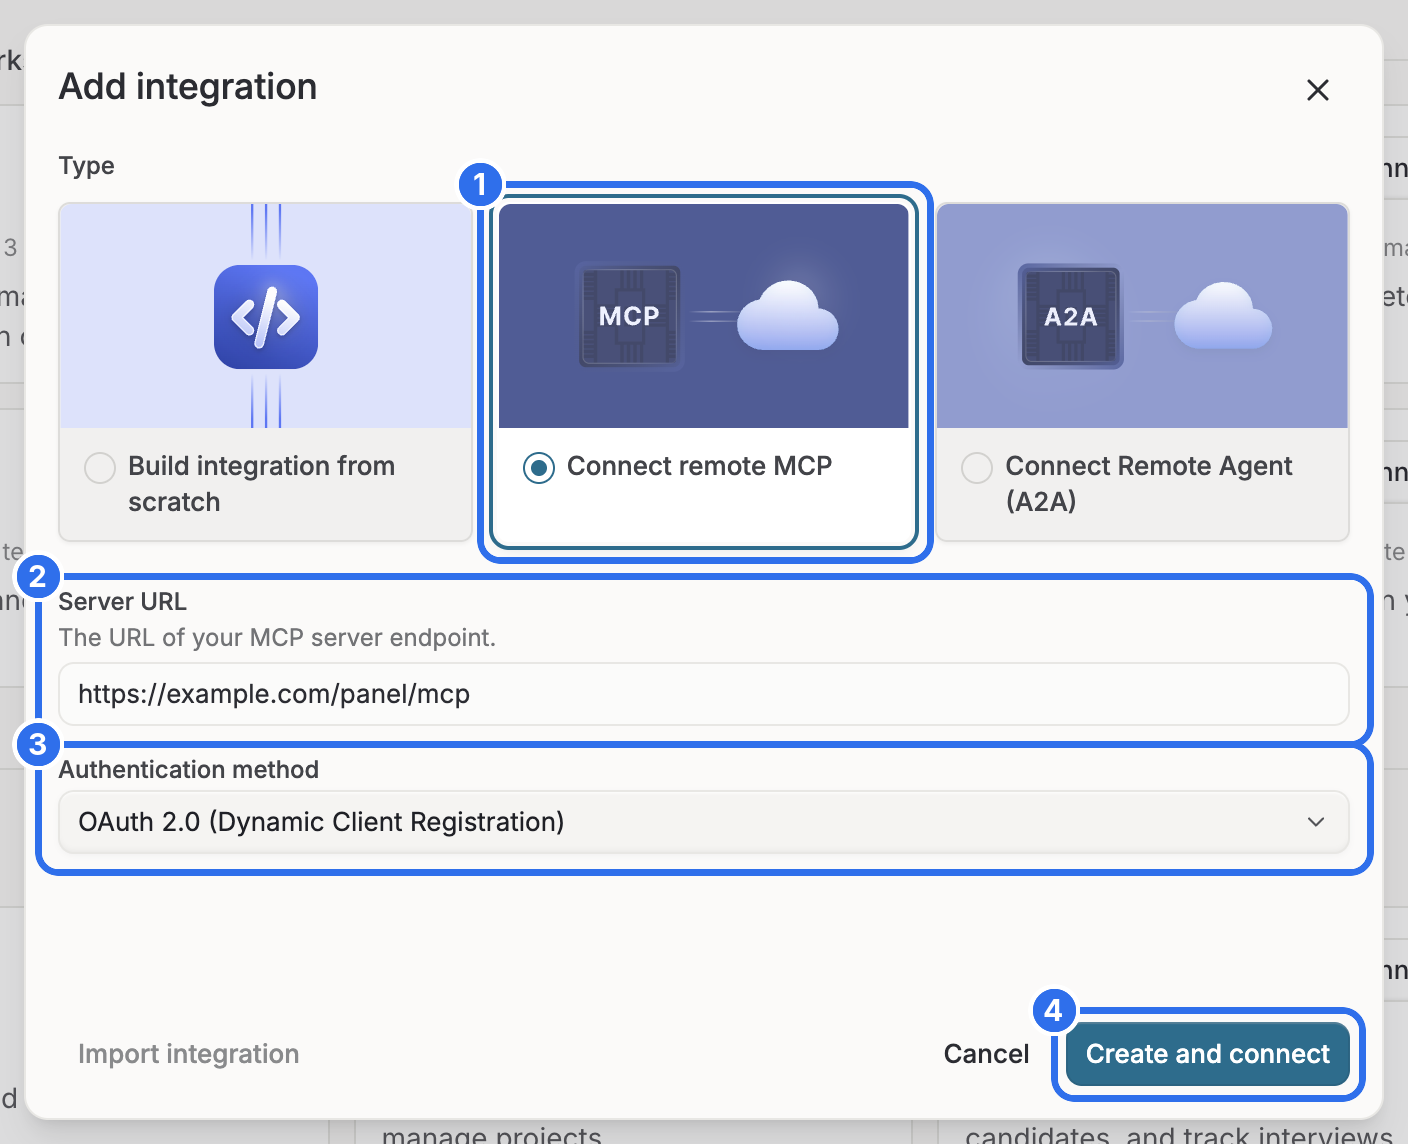
Select Connect remote MCP (1). Paste the MCP URL into Server URL (2) and select OAuth 2.0 (Dynamic Client Registration) as the authentication method (3). Click Create and connect (4).
Allow access
Log in to the Panel if you aren't logged in yet.
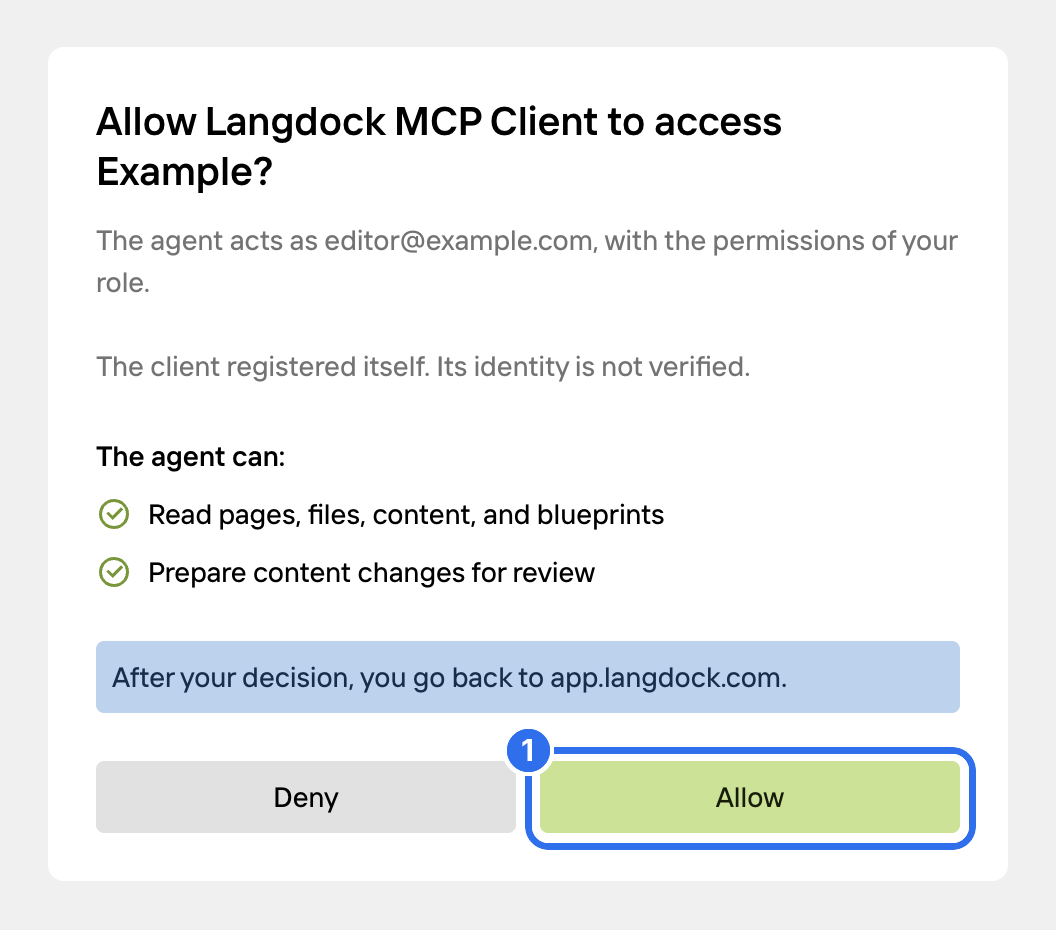
The consent screen shows the Kirby user that Langdock acts as and what Langdock is allowed to do. By default, Langdock can read your content and prepare changes for review. Langdock registers itself with your site, so the screen says that its identity is not verified. Click Allow (1).
Langdock names the integration after your site, for example "Kirby: Example". The connection is listed as "Langdock MCP Client" in the Agents view in the Panel. There you can change its permissions or revoke it.
Choose the tools
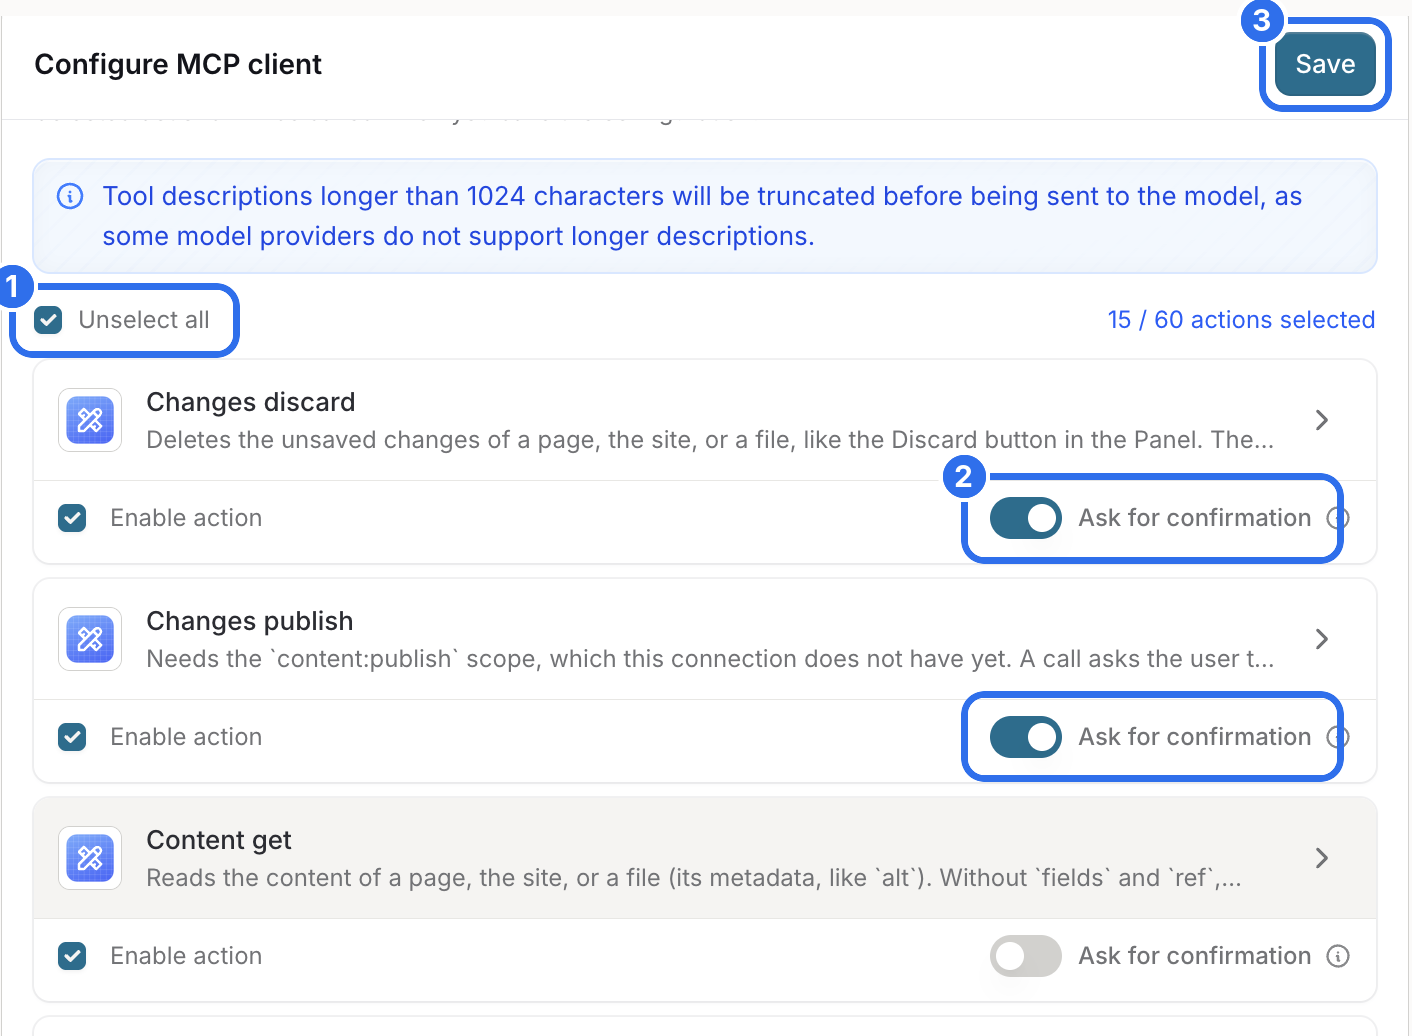
Langdock only uses the tools that you turn on. On the page of the integration, click List Server Features and select all tools (1).
By default, Langdock runs all tools without asking. Turn on Ask for confirmation (2) for the tools that change content: Changes discard, Changes publish, Content update, File delete, File upload, Page create, Page delete and Page update. Click Save (3).
Langdock saves the list of tools. After an update of Kirby Agents, click List Server Features again and save.
Use it in a chat
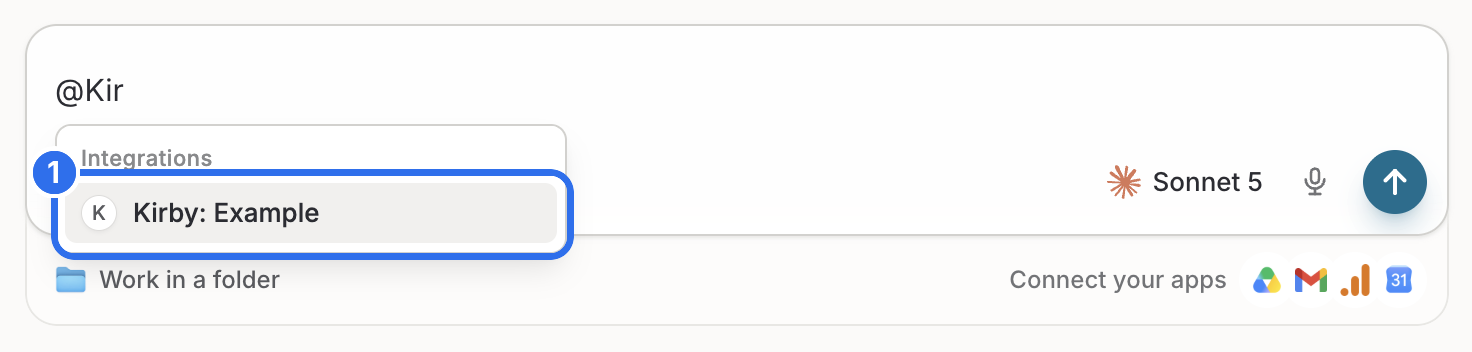
Type @ and the name of the integration in the message field, and select the integration (1).
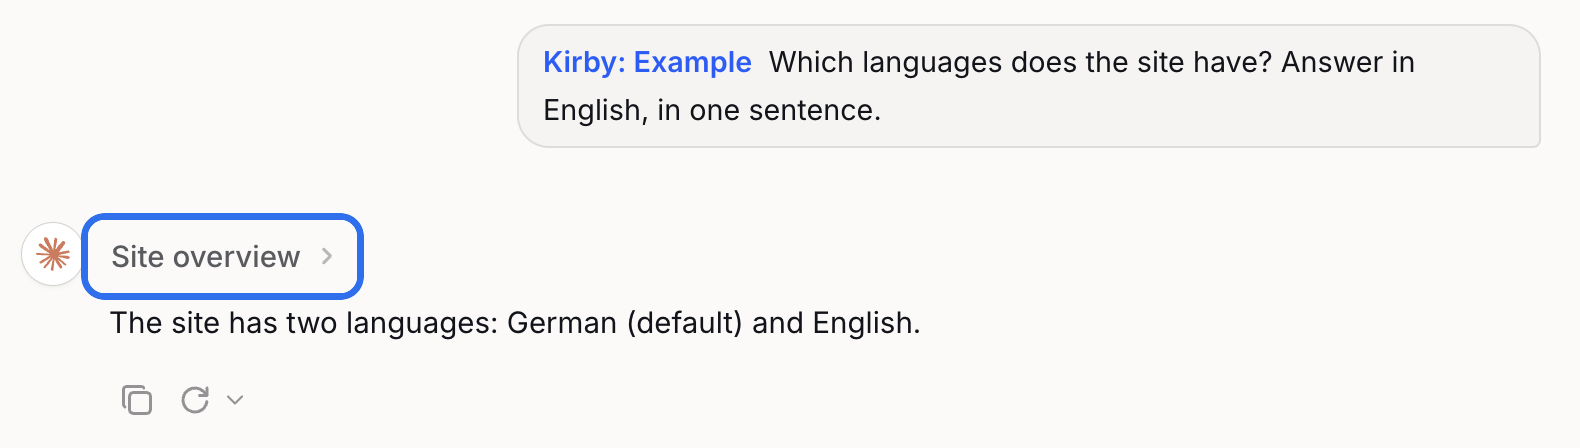
Ask your question. Langdock shows the tools it used above the answer.
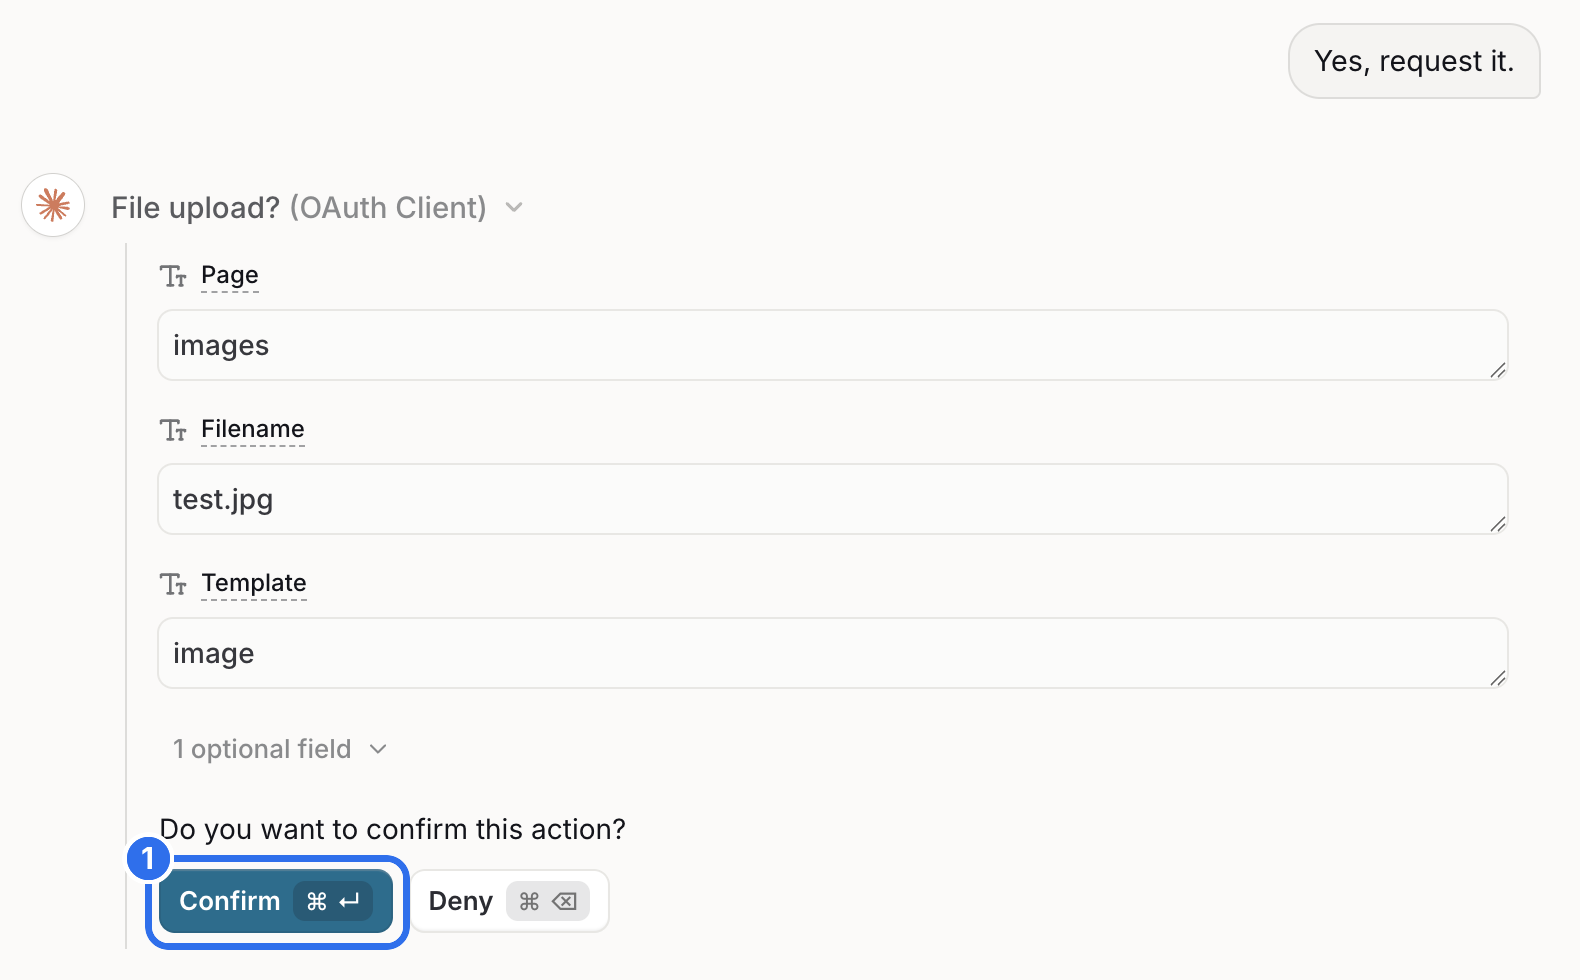
Langdock asks before it uses a tool with confirmation turned on. Click Confirm (1).
When Langdock needs more permissions
By default, Langdock can read your content and prepare changes for review. Other tools, like publishing, creating pages or uploading files, need an extra permission. Langdock can't ask for a new permission during a chat, so the tool call ends with an error. Langdock then shows a Reauthorize button, but it doesn't add the missing permission. Add the permission in the Panel instead.
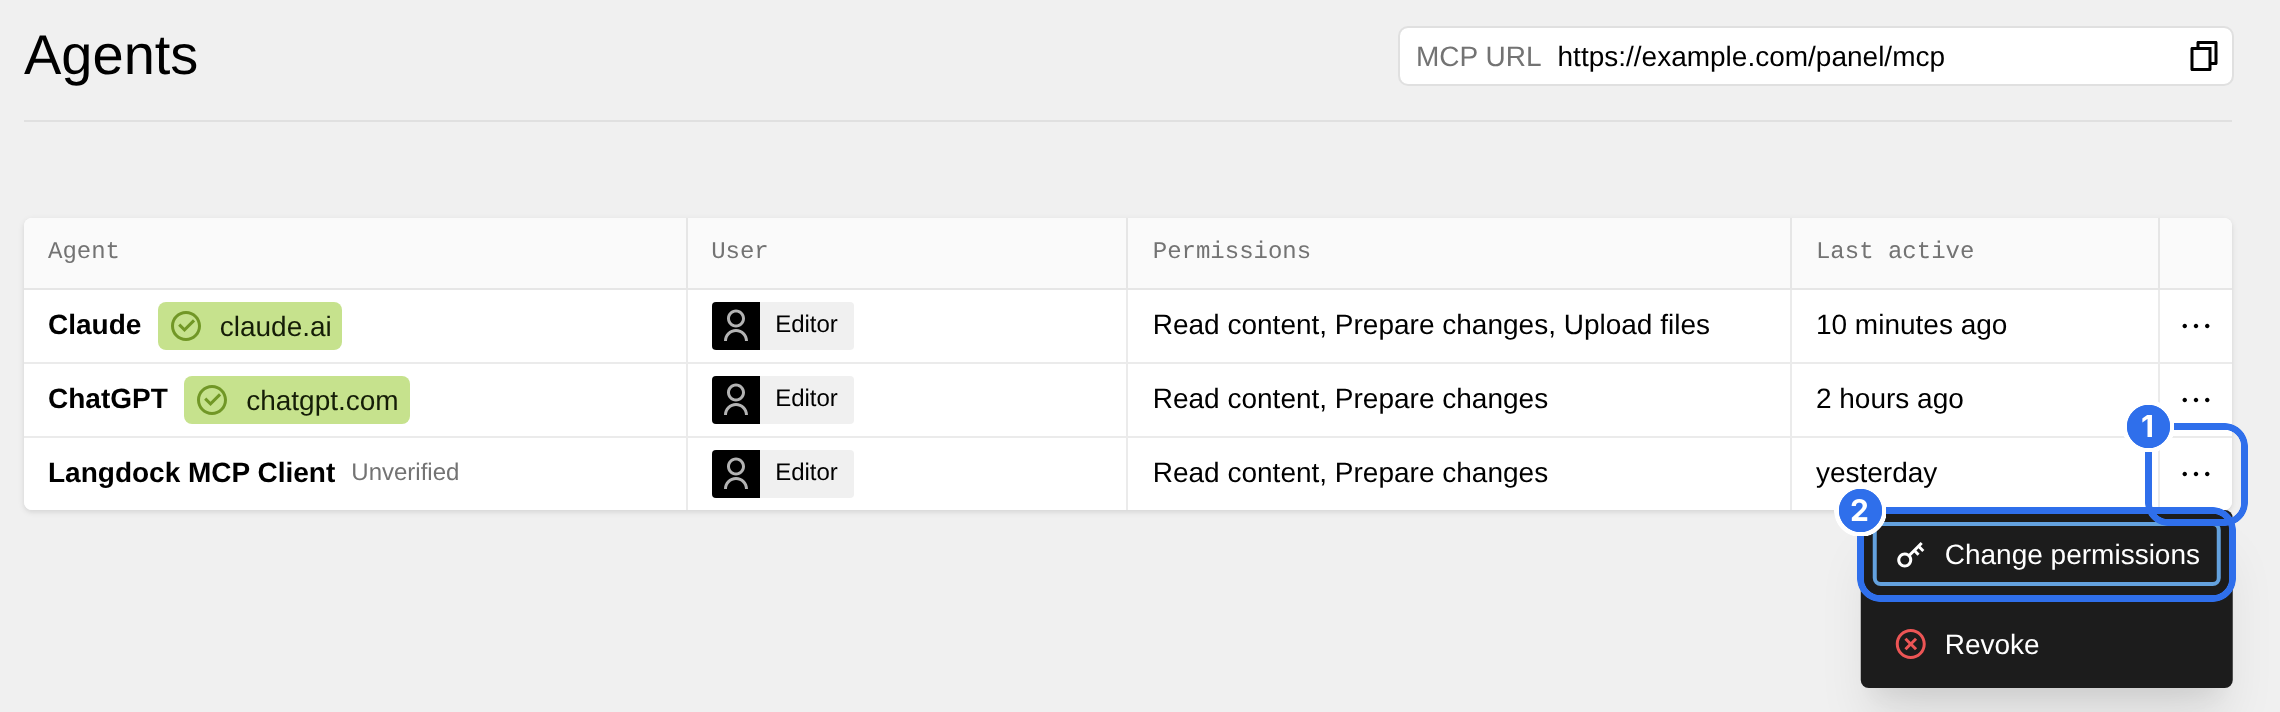
Open the Agents view in the Panel. Click the options of the Langdock connection (1) and choose Change permissions (2).
Select the permission that Langdock needs (1) and click Save (2).
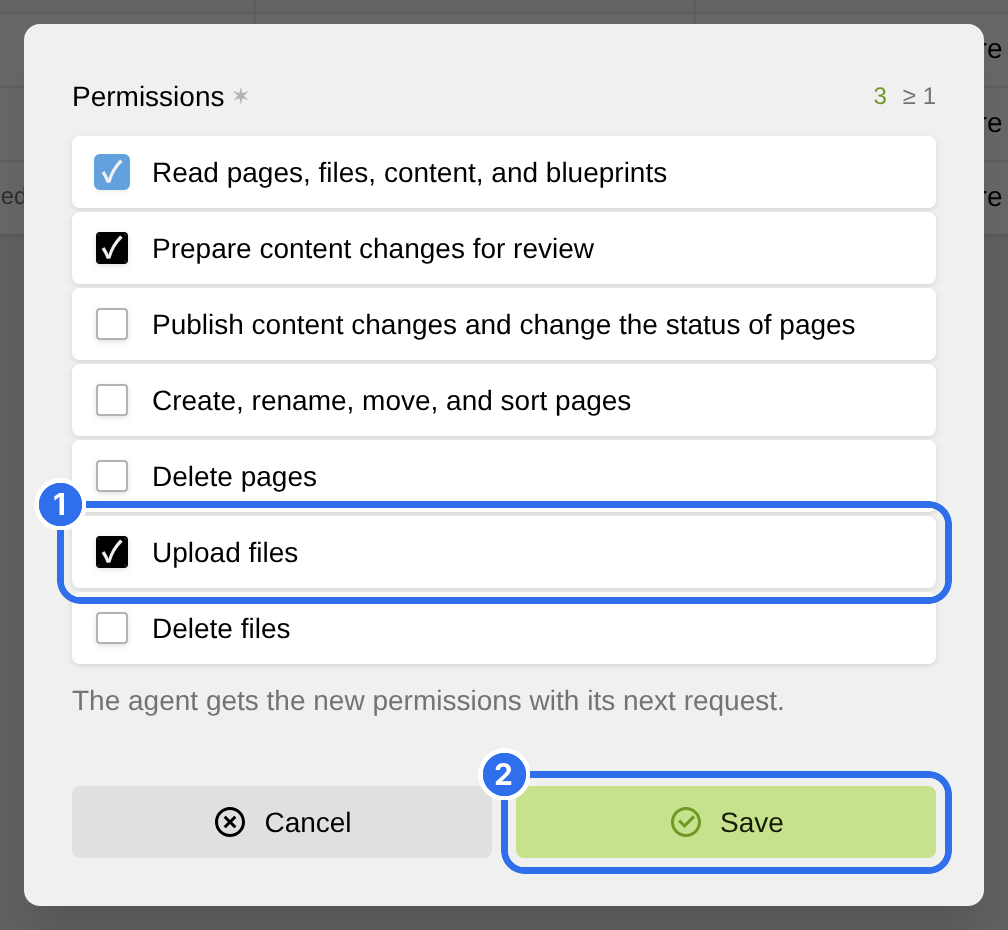
Ask Langdock to try again. The new permission applies to the next request, so you don't have to connect again.